6 Reasons to Buy and 5 Reasons to Skip Motorola Edge 50 Pro

Are you considering buying the Motorola Edge 50 Pro? This flagship smartphone boasts impressive features and specifications, but is it the right choice for you? In this article, we’ll explore six reasons why you might want to buy the Motorola Edge 50 Pro, as well as five reasons why you might want to skip it.

Reasons to Buy:

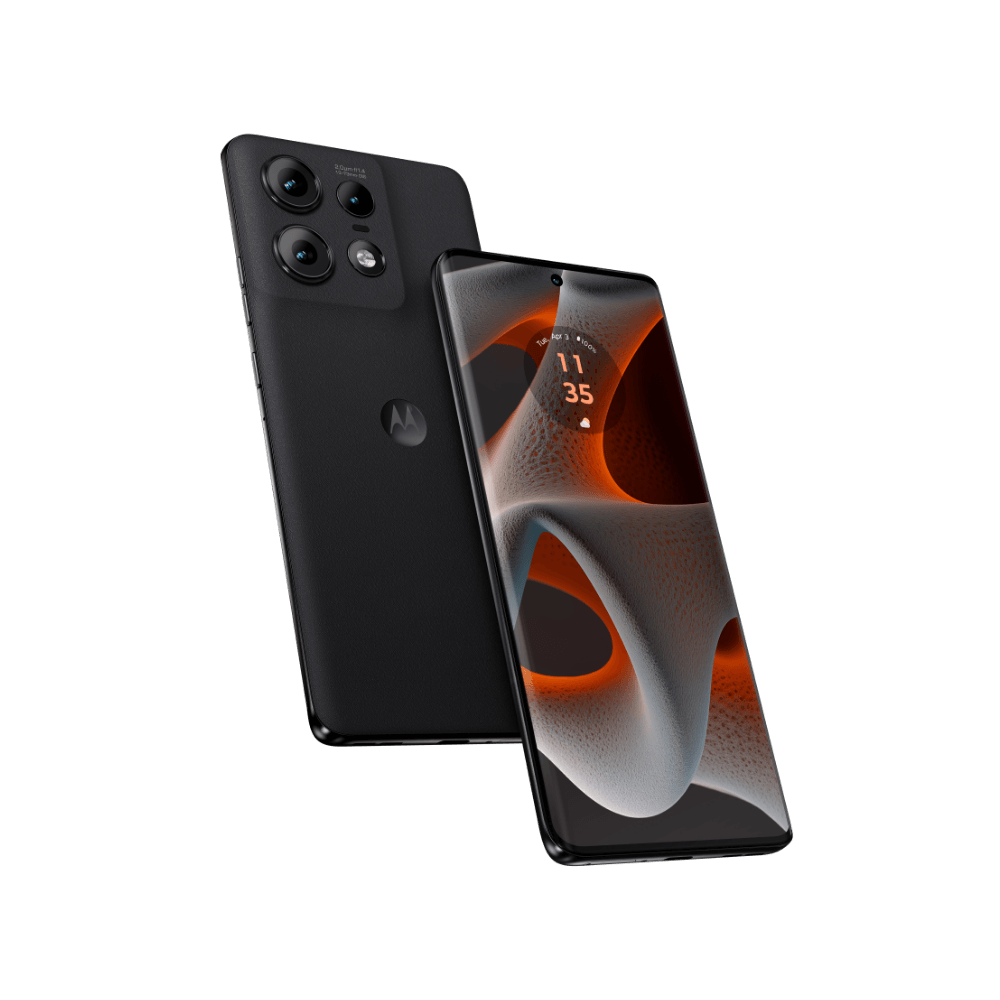
  1. High Refresh Rate Display: The Motorola Edge 50 Pro features a stunning 144Hz P-OLED display, delivering smooth and fluid visuals for an immersive viewing experience.
  2. Impressive Camera Setup: With a 50MP main camera, 10MP telephoto lens, and 13MP ultrawide lens, the Motorola Edge 50 Pro offers versatile photography options, including optical zoom and wide-angle shots.
  3. Fast Charging: The phone supports 125W wired charging, allowing you to fully charge your device in just 18 minutes, which is incredibly convenient for users on the go.
  4. Premium Build Quality: Featuring a glass front, aluminum frame, and options like acetate or eco leather back, the Motorola Edge 50 Pro boasts a premium look and feel.
  5. Future-Proof Connectivity: The Motorola Edge 50 Pro supports 5G connectivity, ensuring compatibility with the latest mobile networks for faster data speeds and lower latency.
  6. Powerful Performance: Equipped with a Qualcomm Snapdragon 7 Gen 3 processor and up to 12GB of RAM, the Motorola Edge 50 Pro offers powerful performance for seamless multitasking and gaming.

Reasons to Skip:

  1. No Expandable Storage: The Motorola Edge 50 Pro lacks a card slot for expandable storage, limiting users to the internal storage options available at purchase.
  2. No 3.5mm Headphone Jack: With no 3.5mm headphone jack, users will need to use wireless headphones or a USB-C adapter for wired audio.
  3. Higher Price Point: Priced at around 700 EUR, the Motorola Edge 50 Pro is positioned at a higher price point, which might be a deterrent for budget-conscious buyers.
  4. Average Battery Capacity: While the phone supports fast charging, the 4500mAh battery capacity might be considered average for a flagship device, especially with the high refresh rate display.
  5. No MicroSD Card Slot: For users who like to expand their storage, the lack of a microSD card slot could be a drawback.

In conclusion, the Motorola Edge 50 Pro offers a range of impressive features and specifications, making it a compelling choice for those looking for a premium smartphone experience. However, it may not be the right choice for everyone, especially those looking for expandable storage or a lower-priced option. Consider your priorities and budget carefully before making your decision.

IELTS Cue Card Questions (Jan-April 2024): Recent Prompts for Speaking Practice

The IELTS speaking test is a significant component of the exam, designed to assess a candidate’s ability to communicate effectively in English. One of the key sections of this test is the Cue Card segment, where candidates are presented with a topic and asked to speak on it for 1-2 minutes. To aid in your IELTS preparation, here is a compilation of Cue Card questions from January to April 2024.

Jan-April 2024:

  1. Talkative Person (A person you know who likes to talk a lot)
  2. An occasion when people near you made a lot of noise
  3. Something that helps you work or study better
  4. A useful object in your home you can’t live without
  5. A piece of technology that you feel difficult to use
  6. A city where you’d like to stay for a short time
  7. A time when you taught a friend or relative something
  8. A time when you missed or were late for a meeting
  9. A place you visited that was affected by air pollution
  10. A new development in your city (e.g. shopping mall)
  11. An interesting old person
  12. Something you did that made you feed proud
  13. A free time activity you enjoyed when you were younger
  14. A person you like or want to work or study with
  15. A time when someone gave you something you really wanted (gift)
  16. A complaint you made and you were satisfied with the results
  17. Something that you would like to learn in the future
  18. A character from a film/movie
  19. A time you went to a noisy place
  20. A daily routine you enjoy
  21. A piece of news that you heard about someone you know well
  22. Your first day at school that you remember
  23. A place in your home where you like to relax
  24. A person you met at a party and enjoyed talking with
  25. An advertisement you don’t like

May-Dec 2023

  1. An occasion when you spent time with a child
  2. An occasion when you got lost
  3. A piece of clothing you wear most often
  4. An occasion when you got incorrect information
  5. A place away from your home you want to visit in the future
  6. An enjoyable experience in your childhood
  7. A game you played in your childhood
  8. A new shop opened in your city
  9. An invention that you know
  10. A car journey
  11. A book you’ve read many times
  12. A person you know who moved into new accomodation
  13. A popular person
  14. A film you watched but did not like and disappointed
  15. A someone you know who often helps others
  16. An ideal house or apartment where you want to live

How to Merge Two Arrays in PHP?

Introduction:
Merging arrays is a common task in PHP programming. Whether you’re combining data from two sources, creating complex datasets, or handling user inputs, understanding how to merge arrays is essential. In this tutorial, we will walk you through different techniques to merge two arrays in PHP, along with examples and use cases.

  1. Using the array_merge() function:
    The array_merge() function is a straightforward way to combine two or more arrays into a single array. It appends the elements of one array to another, maintaining numeric keys.
    $array1 = [1, 2, 3];
    $array2 = [4, 5, 6];
    $mergedArray = array_merge($array1, $array2);
    // Result: [1, 2, 3, 4, 5, 6]
  2. Merging with the + operator:
    The + operator can also be used to merge arrays. It combines the arrays while preserving the keys of the first array. Keys that exist in both arrays will not be overwritten.
    $array1 = ['a' => 1, 'b' => 2];
    $array2 = ['b' => 3, 'c' => 4];
    $mergedArray = $array1 + $array2;
    // Result: ['a' => 1, 'b' => 2, 'c' => 4]
  3. Combining arrays using the array_merge_recursive() function:
    When dealing with arrays containing the same keys, but with different values, array_merge_recursive() comes in handy. It merges arrays recursively, combining their values into arrays even if they have the same keys.
    $array1 = ['a' => 1, 'b' => 2];
    $array2 = ['b' => 3, 'c' => 4];
    $mergedArray = array_merge_recursive($array1, $array2);
    /* Result:
    [
    'a' => [1],
    'b' => [2, 3],
    'c' => [4]
    ]
    */
  4. Merging arrays with array union (array_union()):
    In scenarios where you want to merge arrays without overwriting values, you can define a custom function for array union.
    function array_union($arr1, $arr2) {
    return array_unique(array_merge($arr1, $arr2));
    }
    $array1 = [1, 2, 3];
    $array2 = [3, 4, 5];
    $mergedArray = array_union($array1, $array2);
    // Result: [1, 2, 3, 4, 5]

Remember, the choice of method depends on your specific requirements. Understanding these techniques will empower you to efficiently manipulate arrays and create dynamic and flexible PHP applications. Happy coding!

Step-by-Step Guide: Building a Beginner-Friendly Laravel 8 CRUD Application

Introduction

Laravel, one of the most popular PHP frameworks, empowers developers to build robust web applications with ease. In this step-by-step tutorial, we will guide you through the process of creating a Laravel application capable of performing CRUD (Create, Read, Update, Delete) operations. By the end of this tutorial, you will have a fully functional CRUD application, demonstrating the power and elegance of Laravel.

Prerequisites

Before we start, ensure you have the following prerequisites:

  1. Basic knowledge of PHP and web development concepts.
  2. Familiarity with HTML, CSS, and Bootstrap for the frontend.
  3. A local development environment with PHP, Composer, and a supported database (e.g., MySQL, PostgreSQL).

Step 1: Setting Up Laravel

Begin by installing Laravel using Composer. Open your terminal or command prompt and run the following command:

composer create-project laravel/laravel crud-app

This command will create a new Laravel project named “crud-app” in a directory with the same name.

Step 2: Database Configuration

Navigate to the project’s root directory and open the .env file. Configure your database settings by providing the appropriate credentials for your local development environment.

DB_CONNECTION=mysql
DB_HOST=127.0.0.1
DB_PORT=3306
DB_DATABASE=your_database_name
DB_USERNAME=your_database_user
DB_PASSWORD=your_database_password

Don’t forget to create an empty database with the name you specified in the .env file.

Step 3: Creating the Model and Migration

In Laravel, models represent database tables, and migrations are used to create and modify database tables. Let’s create a model and migration for our “Task” entity:

Run the following command in the terminal or command prompt:

php artisan make:model Task -m

This will create a Task model in the app directory and generate a migration file in the database/migrations directory.

Step 4: Defining the Table Structure

Open the generated migration file in the database/migrations directory. Inside the up() method, define the structure of the “tasks” table. A basic “tasks” table might include fields like id, title, description, and timestamps created_at and updated_at. Add the following code to the migration file:

public function up()
{
    Schema::create('tasks', function (Blueprint $table) {
        $table->id();
        $table->string('title');
        $table->text('description');
        $table->timestamps();
    });
}

Step 5: Running Migrations

Now, run the migration to create the “tasks” table in your database:

php artisan migrate

Step 6: Creating Routes and Controller

Routes in Laravel define the entry points to your application. Let’s create routes for our CRUD operations:

In the routes/web.php file, add the following code:

use App\Http\Controllers\TaskController;

Route::get('/tasks', [TaskController::class, 'index']);
Route::get('/tasks/create', [TaskController::class, 'create']);
Route::post('/tasks', [TaskController::class, 'store']);
Route::get('/tasks/{task}', [TaskController::class, 'show']);
Route::get('/tasks/{task}/edit', [TaskController::class, 'edit']);
Route::put('/tasks/{task}', [TaskController::class, 'update']);
Route::delete('/tasks/{task}', [TaskController::class, 'destroy']);

Next, create the TaskController using the following command:

php artisan make:controller TaskController --resource

This command will generate a controller with resourceful methods for our CRUD operations.

Step 7: Implementing the Controller

Open the TaskController.php file in the app/Http/Controllers directory. Inside this file, you will find methods like index, create, store, show, edit, update, and destroy.

Implement the necessary logic in each method to interact with the Task model for performing CRUD operations.

Step 8: Creating Views

Views are responsible for presenting the data to users. Create the following view files in the resources/views directory:

  1. index.blade.php: To display the list of tasks.
  2. create.blade.php: To create a new task.
  3. edit.blade.php: To edit an existing task.
  4. show.blade.php: To display details of a specific task.

In each view file, use HTML and Blade syntax to create the necessary form elements and display data from the database.

Step 9: Testing the Application

Run the development server using the following command:

php artisan serve

Now, open your web browser and access http://localhost:8000/tasks. You should see your Laravel CRUD application in action!

Conclusion

Congratulations! You’ve successfully developed a Laravel application capable of performing CRUD operations. Through this tutorial, you’ve learned essential concepts like setting up Laravel, creating models and migrations, defining routes, building controllers, and creating views.

Laravel’s elegance and simplicity make it an excellent choice for developing web applications of all sizes and complexities. Keep exploring Laravel’s vast ecosystem and documentation to take your skills to the next level. Happy coding!

How to Install Laravel on Windows 10 or 11?

Introduction:

Laravel is a popular PHP framework that enables developers to build web applications quickly and efficiently. Whether you’re a seasoned developer or just starting with PHP, installing Laravel on Windows 10 or 11 is a straightforward process. In this step-by-step guide, we’ll walk you through the installation process so you can begin creating powerful web applications with Laravel.

Before you begin:

Ensure that you have the following prerequisites installed on your Windows machine:

  1. PHP (7.3.0 or higher)
  2. Composer (latest version)
  3. Git (latest version)
  4. A development environment like XAMPP or WampServer (optional, but recommended)

Step 1: Install PHP

If you don’t have PHP installed on your Windows machine, you can download the latest version of PHP from the official website (https://windows.php.net/download/). Be sure to choose the right version (x64 or x86) based on your system architecture. After downloading, follow the installation wizard to install PHP on your machine.

Step 2: Install Composer

Composer is a package manager for PHP that Laravel heavily relies on. To install Composer, follow these steps:

Download the Composer Windows Installer from https://getcomposer.org/Composer-Setup.exe.
Run the installer and follow the on-screen instructions. When asked to select PHP, make sure to point it to the PHP executable you installed in Step 1.

Step 3: Install Git (Optional)

Git is useful for version control and pulling Laravel updates. If you don’t have Git installed, you can download it from the official website (https://git-scm.com/downloads) and follow the installation instructions.

Step 4: Set Up Laravel

Now that you have PHP, Composer, and Git (optional) installed, it’s time to set up Laravel.

  1. Open your preferred terminal or command prompt on Windows (e.g., Command Prompt or PowerShell).
  2. Navigate to the directory where you want to install Laravel. For example, if you want to install it in C:\xampp\htdocs, use the cd command like this:
    cd C:\xampp\htdocs
  3. Use Composer to create a new Laravel project. Run the following command:
    composer create-project laravel/laravel my-project
    Replace my-project with the name of your project; this will create a new Laravel project in the specified directory.

Step 5: Start Laravel Development Server

  1. Navigate to your Laravel project directory using the command prompt:
    cd my-project
  2. Start the Laravel development server by running the following command:
    php artisan serve
  3. The development server will be accessible at http://localhost:8000. Open your web browser and visit this URL to see the Laravel welcome page.

Congratulations! You’ve successfully installed Laravel on your Windows 10 or 11 machine. You are now ready to start building your web applications using the powerful Laravel framework.

Conclusion:
Installing Laravel on Windows 10 or 11 is a simple process that requires PHP, Composer, and optionally, Git. By following the steps outlined in this guide, you can quickly set up your development environment and start creating amazing web applications with Laravel. Happy coding!

How to Download Files from a URL using CURL in PHP?

Introduction:

Downloading files from the internet is a common requirement in web development. In this blog post, we will explore how to download files from a URL using PHP’s CURL library. CURL is a versatile library that allows us to interact with various protocols, including HTTP, HTTPS, FTP, and more. By the end of this tutorial, you will have a good understanding of how to fetch files from a remote URL and save them locally using PHP and CURL.

Prerequisites:

Before we begin, make sure you have PHP installed on your system. Additionally, ensure that the CURL extension is enabled, as it comes enabled by default in most PHP installations.

Step 1: Initializing CURL

First, let’s start by initializing a CURL session in PHP. We’ll use the curl_init() function to create a new CURL resource. This function will return a CURL handle, which we will use for further operations.

<?php
// Initialize CURL
$ch = curl_init();

Step 2: Setting CURL options
Next, we need to set some options for our CURL request. At a minimum, we’ll specify the URL from which we want to download the file and set the CURLOPT_RETURNTRANSFER option to true, which will ensure that the response is returned as a string instead of being output directly.

<?php
// Set the URL to download the file from
$url = 'https://example.com/file-to-download.zip';

// Set CURL options
curl_setopt($ch, CURLOPT_URL, $url);
curl_setopt($ch, CURLOPT_RETURNTRANSFER, true);

Step 3: Executing the CURL request
Now that we have set the required options, we can execute the CURL request using curl_exec(). This function will return the file contents as a string.

<?php
// Execute the CURL request and get the response
$fileContents = curl_exec($ch);

Step 4: Handling errors and cleaning up
It’s essential to handle any errors that may occur during the CURL request. We can check for CURL-specific errors using curl_errno() and retrieve the error message using curl_error(). Additionally, don’t forget to close the CURL session using curl_close().

<?php
// Check for CURL errors
if(curl_errno($ch)) {
echo ‘CURL Error: ‘ . curl_error($ch);
// Handle the error accordingly (e.g., logging, displaying a message)
}

// Close the CURL session
curl_close($ch);

Step 5: Saving the downloaded file
Finally, we can save the downloaded file to our server using standard file handling functions in PHP, such as file_put_contents().

<?php
// Specify the path where you want to save the downloaded file
$savePath = '/path/to/save/file.zip';

// Save the downloaded file
if(file_put_contents($savePath, $fileContents)) {
    echo 'File downloaded successfully.';
} else {
    echo 'Failed to save the file.';
}

Conclusion:
In this blog post, we learned how to download a file from a URL using PHP and CURL. By initializing a CURL session, setting appropriate options, executing the request, and handling errors, we can fetch files from remote URLs and save them locally with ease. This process is useful for various web development tasks, such as downloading images, documents, or other resources for your PHP applications. Happy coding!

AngularJS Image Upload with Preview Example

Image upload functionality is a common requirement in web applications, and AngularJS provides an excellent framework to achieve this seamlessly. In this blog post, we will walk you through the process of building an AngularJS image upload feature with a simple and practical example.

Prerequisites:

Before we dive into the implementation, make sure you have the following prerequisites in place:

  1. Basic knowledge of HTML, CSS, and JavaScript.
  2. Familiarity with AngularJS framework.

Getting Started:

To get started, create a new AngularJS project or use an existing one. If you’re starting from scratch, you can use the following steps:

  1. Create a new folder for your project and navigate into it.
  2. Initialize a new AngularJS project using Angular CLI or manually set up your project structure.
  3. Include AngularJS library into your project using a script tag or any other preferred method.

Once you have set up your project, you are ready to start building the image upload functionality.

Step 1: HTML Markup

Create a new HTML file (e.g., index.html) and define the basic structure of your page. For this example, we’ll have a simple form to upload an image:

<!DOCTYPE html>
<html>
<head>
    <title>AngularJS Image Upload Example</title>
</head>
<body ng-app="imageUploadApp">
    <div ng-controller="ImageUploadController">
        <h2>Image Upload</h2>
        <form ng-submit="uploadImage()" enctype="multipart/form-data">
            <input type="file" ng-model="image" accept="image/*" />
            <button type="submit">Upload</button>
        </form>
    </div>
    <script src="https://ajax.googleapis.com/ajax/libs/angularjs/1.8.2/angular.min.js"></script>
    <script src="app.js"></script>
</body>
</html>

Step 2: AngularJS Module and Controller

In this step, we will create an AngularJS module and a controller to handle the image upload functionality. Create a new JavaScript file (e.g., app.js) and add the following code:

// app.js
angular.module('imageUploadApp', [])
.controller('ImageUploadController', ['$scope', '$http', function($scope, $http) {
    $scope.uploadImage = function() {
        if ($scope.image) {
            var formData = new FormData();
            formData.append('image', $scope.image);

            $http.post('/upload', formData, {
                transformRequest: angular.identity,
                headers: { 'Content-Type': undefined }
            })
            .then(function(response) {
                // Handle success, e.g., display a success message
                console.log('Image uploaded successfully:', response.data);
            })
            .catch(function(error) {
                // Handle error, e.g., display an error message
                console.error('Error uploading image:', error);
            });
        } else {
            // Handle case when no image is selected
            console.warn('Please select an image before uploading.');
        }
    };
}]);

Step 3: Set Up a Server (Optional)

To handle the image upload on the server-side, you need a backend application (e.g., Node.js, Python Flask, Ruby on Rails) to receive and process the uploaded image. This step is optional, as you can test the AngularJS image upload locally without a backend, but for a complete application, you’ll need a server to handle the uploaded files.

Step 4: Test the Image Upload

Now that you have set up the AngularJS module, controller, and optionally the server, you can test the image upload functionality. Open index.html in your browser, select an image using the file input, and click the “Upload” button.

If you set up the backend, ensure it’s correctly configured to receive the image and save it to a designated location.

Conclusion

Congratulations! You have successfully implemented the AngularJS image upload feature with a practical example. This functionality can be extended to suit your application’s specific needs, such as displaying the uploaded image or supporting multiple image uploads.

Remember to ensure proper validation and error handling on both the client and server sides to provide a smooth user experience.

Happy coding!